The Structure Sensor hardware component should be properly attached to the iPad using the included attachment bracket before any calibration or scanning.
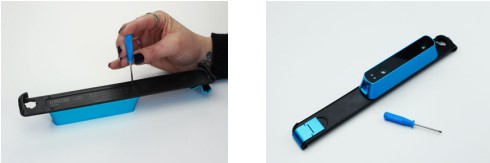
Step 1: Attach the sensor and bracket (if not done already)
Using the included screwdriver and screws, attach the sensor to the supplied bracket. The data and charging ports on the sensor should be facing toward the bottom of the bracket (the portion with the latch mechanism).
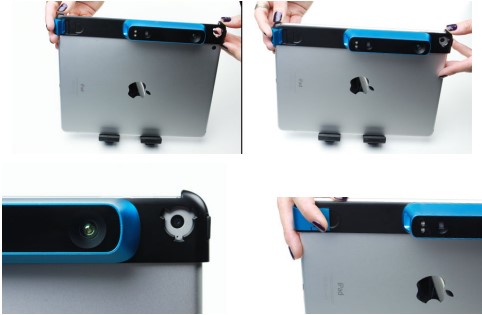
Step 2: Attach the sensor/bracket unit to the iPad
To attach the unit to the iPad, make sure that the latch mechanism is in the open position and slide the unit onto the side of your iPad. Ensure the bracket’s camera hole is positioned over the iPad camera. When the bracket is firmly slid onto the iPad and aligned properly, close the latch by pressing down on it.
Step 3: Connect the sensor/bracket unit to the iPad via Lightning cable
Connect the sensor unit with the iPad with the supplied Lightning cable. The wider end of the cable connects to the sensor, and the gold-colored pins should be facing up as it is plugged into the sensor. The other end of the cable (with the Lightning connector) goes into the iPad.
The sensor is now connected to the iPad and ready for calibration.